Problems with LP Smartside Installations


Based on a blog post by Reuben Saltzman, September 29, 2015 (http://structuretech1.com/problems-with-lp-smartsideinstallations/)
LP SmartSide® products are some of the fastest growing siding brands in the United States, with just more than 9 billion feet sold since their launch in 2007. This is also one of the most popular choices for siding and trim by builders in Minnesota, where I live. This product looks similar to fiber cement siding, but actually falls under the category of wood composite siding. This is how we as home inspectors should identify this product in our inspection reports.
LP SmartSide® siding and trim seem to be great products and I have yet to find a single failure with either product. Nevertheless, I suspect I’ll be seeing failures soon enough because I find installation errors on nearly every home I inspect. When inspecting homes that have this type of wall covering, look out for the installation defects described below. These are the most common mistakes being made by installers today.
Missing Paint
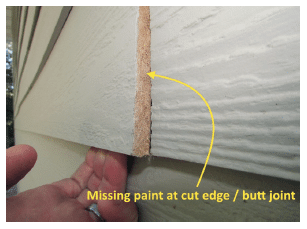
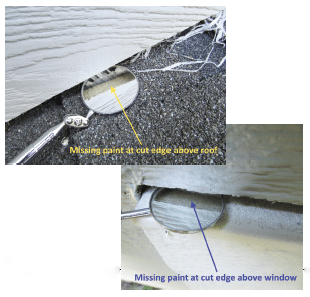
Without a doubt, the most common installation error that I find with LP SmartSide® products is missing paint at the cut edges. The manufacturer requires all exposed surfaces to be primed and painted.The image to the right also shows missing sealant at the joint.
Overdriven Nails
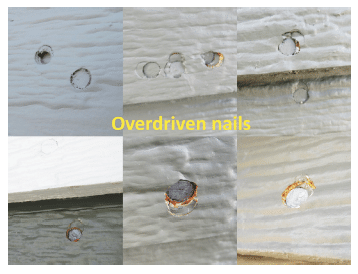
This is another common defect. Here’s a small collage of overdriven nails.
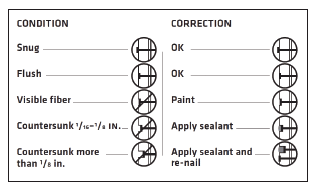
The diagram below shows the appropriate repair methods for overdriven nails.
Insufficient Clearance
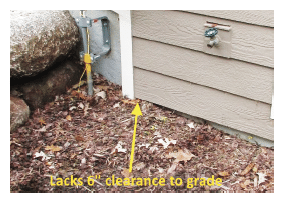
The manufacturer requires 6 inches of clearance from the siding to the finished grade. It seems that almost every home has one or two areas where this clearance requirement isn’t met.
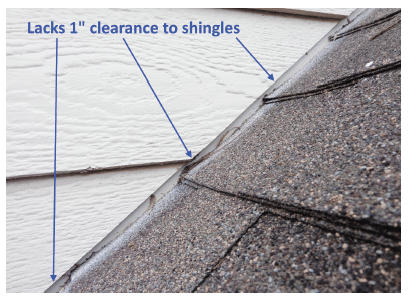
The manufacturer also requires 1-inch clearance to shingles. This is usually done right, but not always.
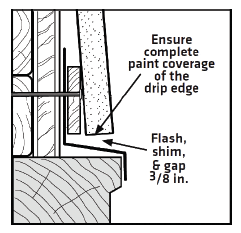
The manufacturer requires a 3/8-inch gap above windows and other similar penetrations.
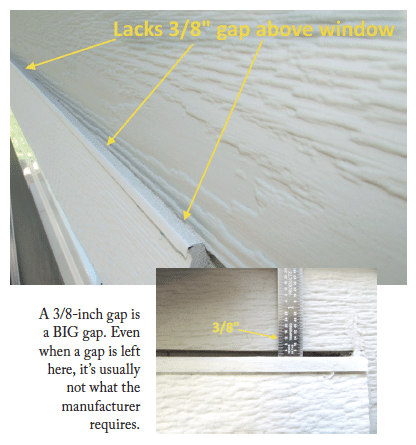
This is rarely done.
Improper Spacing at Ends
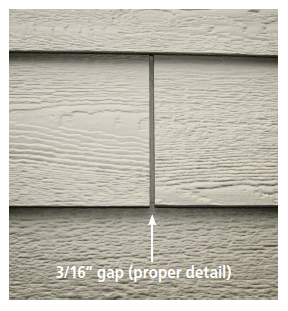
The manufacturer requires a 3/16-inch gap at the end of each piece of siding. This includes butt joints and places where the siding terminates vertically against windows, doors and other fixtures.
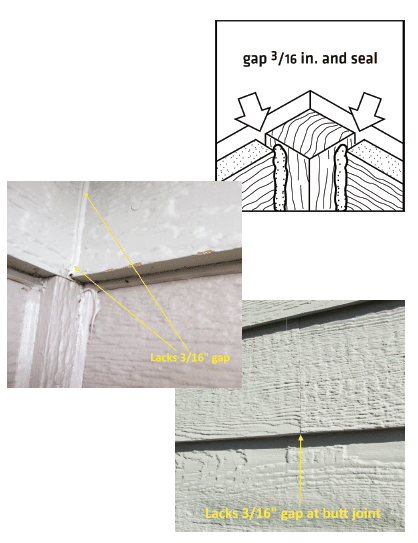
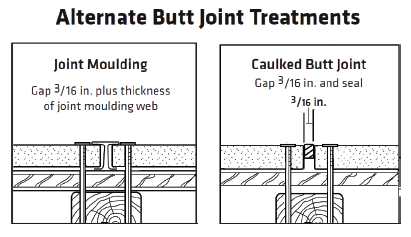
A 3/16-inch gap is a pretty large gap. Here’s what a proper 3/16-inch gap looks like:
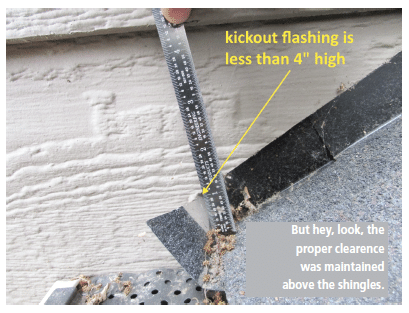
Insufficient Kickout Flashing
Kickout flashing is a piece of metal at a roof end that prevents water from leaking into the wall. For more information about this issue, refer to my related blog post (http://structuretech1.com/kickout-flashing/) and the diagram below, courtesy of the fine folks at Code Check.
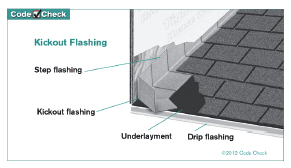
The manufacturer requires flashing to have a 4-inch upper leg. This means the kickout flashing needs to be 4 inches high. This usually isn’t done.
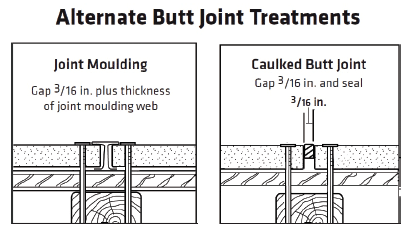
Joint Treatments
There are three options for keeping water out of the butt joints. The first and second options are to have the joints caulked or have joint molding installed.
The third option is to have flashing at least 4 inches wide installed at the joints, as long as the ends of the siding are factory finished and the siding is prefinished by an approved or preferred prefinisher. That means no cut edges at the butt joints. When field-cut edges are present, flashing at the joints is not an appropriate installation method.
Conclusion
That wraps up my list of the most common installation defects seen with LP SmartSide® products. Again, this is not a full list of defects. For the full list of installation instructions and for more information on these products, visit the LP Smartside® website (http://lpcorp.com/products/siding/lp-smartside-trim-siding/).

To Read the Full Article
ASHI offers its members unparalleled resources to advance their careers. ASHI offers training for inspectors at all levels of knowledge and experience, including resources about all major home systems. Members benefit from a vast network of experienced professionals, providing a community for mentorship and knowledge sharing..
In this Issue

FIND A HOME
INSPECTOR
Professional Networking
Grow your professional network, find a mentor, network with the best, and best part of the community that’s making home inspection better every day.
