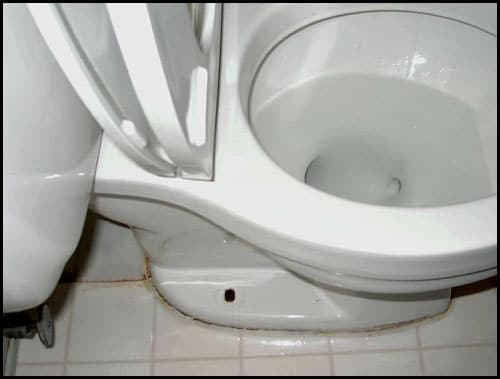
How a Plumber Inspects Plumbing: Toilets
Part III of III
Closet (toilet) flanges
In this final installment of “How a Plumber Inspects Plumbing: Toilets,” I focus on how the fixtures are attached to the plumbing, describe some common connection concerns and provide inspections tips. And, although beyond the scope of a home inspection, I’ll share common fixes plumbers rely on to secure and seal loose bowls after the defect is discovered.
Installing closet (toilet) flanges
Although some toilets designed for residential use are secured to the wall, the majority of toilets in homes today sit on a flange installed at the floor. In recent years, the material composition of these fittings has changed, along with drain, waste and vent (DWV) piping itself. For the most part, in residential new construction, metal flanges made of brass and cast iron have been replaced by those made of ABS and PVC plastic. One thing that hasn’t changed is that a poorly installed or broken closet flange (toilet flange) almost always results in a toilet that is loose at the floor.
In the November issue of the ASHI Reporter, in a sidebar titled “Doing it Right: Is This the Right Toilet,” I discussed how the distance between the center of the closet flange and the wall is determined and how it plays an important part in the installation and operation of the toilet. Another measurement critical in the placement of the flange is flange height. Professional plumbers know a properly set flange is one that rests on the floor and is anchored to it. However, plumbers also know, like with many things in plumbing, there is some flexibility. A flange set even with or slightly below the floor surface generally will work as long as there is sufficient support under it and it is held tightly in place.
Closet flanges are made for 3″- or 4″-pipe. Three-inch fittings will sometimes be solvent-welded (glued) onto a 3″-pipe or to the inside of 4″-pipe. Four inch fittings that fit over 4″-pipe are sold, but rarely used. On concrete-slab construction, some plumbers will turn up a long section of 4″-pipe to extend well above the finished slab floor and cut it flush with the slab once the concrete sets up. Later, a special 3″-toilet flange is primed, glued and pressed into the pipe until it is flush against the floor. Metal-hit anchors and large washers can be used to hold it firmly in place.
Some installers prefer to set flanges before the slab is poured. To anchor them, the installer hangs bolts through the anchoring holes so they dangle below the flange and will be enveloped by and set in the concrete. Others believe the concrete alone will grip the flange sufficiently to hold it against the floor. Over the years, I’ve noticed that setting the flange before the slab is poured frequently results in misaligned and uneven flanges that are too low for the toilet to be set without adjustments.
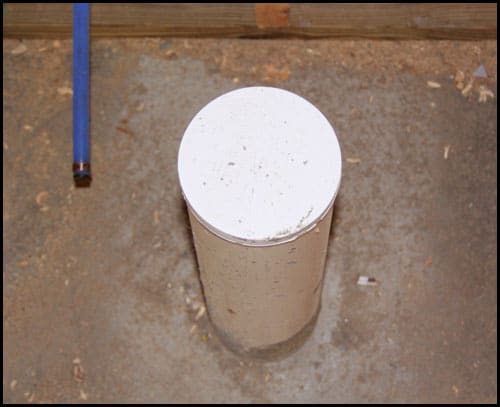
Photo: The 4”-pipe in the photo will be cut flush with the concrete floor so a closet flange can be sealed into the pipe and anchored to the floor.
While plastic flanges are solvent-welded (glued) to the piping, brass flanges were primarily soldered to lead. Older cast-iron flanges were generally set over a cast-iron fitting or section of pipe and a lead-caulked joint was used to join them. No-Hub cast-iron flanges were banded to the system.
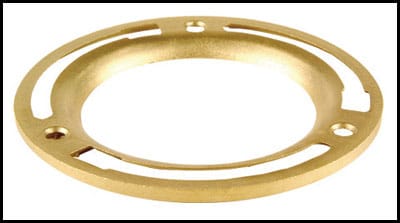
Photo: Brass flange. Photo by Oatey
A standard closet flange can be set with the long slots positioned so the closet bolts (toilet bolts) can be manipulated through and along to a closed anchoring point. This seems to be the favorite method of installation. Some flanges do allow you to install them more precisely using two smaller bolt slots set across from each other and at the same distance from the wall. This provides a thicker flange lip to hold the closet bolts — one less likely to break than bolts installed in the long slots. Though I favor this method, either method would be correct.

Photo: The flange can be positioned so the slots at the right and left or top and bottom of the flange are used. Photo by Oatey
In wood-constructed floors, it is rare to find a flange that was sealed where it passed through the sub-floor. Most plumbers open the floor with a reciprocating saw, which tends to leave a rough and somewhat irregular opening. The opening is not watertight. Any water from under the bowl or passing under it can easily flow through the opening around the pipe and flange and drip to the space below.
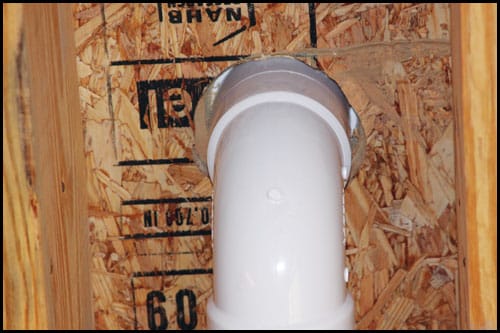
Photo: As you can see in the photo, the cut in the wood below this flange is irregular and would not be watertight.
I’ve noted how flanges are secured to concrete floors. Securing the flange to a wood floor is more critical. On many occasions, I have pulled toilets from the floor only to discover flanges with few or no screws holding them in place. I’ve found flanges merely nailed to the floor or held by screws that lack sufficient length to do the job. But the number one defect in anchoring tends to be screws that have simply rusted away. The major codes require this type of work to be done with water-resistant anchors and brass is often recommended. Stainless steel also works well.
Screws should be long enough to tightly grip the floor and large enough so the heads won’t pull through the openings. As for the number of anchors or screws, I don’t recall seeing a flange with fewer than four anchoring holes. In some cases, they have six or more. If possible, I install a minimum of four screws or anchors. Experience has taught me that using the anchor holes closest to the closet bolts makes the toilet less likely to move.
Wax seals and other bowl gaskets
The primary method of sealing in the water and sealing out the sewer gases at the toilet’s base is to place a wax seal (wax ring) between the bowl and the flange. Because there is little pressure at this connection, a simple seal made of this sticky, water-resistant material does a good job. The standard wax ring is about 1″ high and will fit the standard toilet flange. Thicker (1-1⁄5″) seals that use 40 percent more wax also are available. Wax seals will sometimes have to be reshaped and even spliced together for offset flanges and older flanges installed on 4″-pipe.
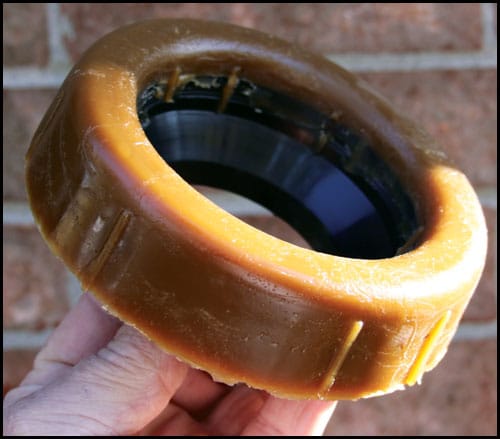
Wax-encased urethane rings may make the device a little more durable. Also, sponge seals and mechanical seals that attach to the underside of the bowl, extend downward and seal the bowl’s outlet into the piping itself can be found. Wax rings with plastic extensions, sometimes called horns, are popular. The horn extends slightly into the flange and directs the flush more precisely down the drain. As a plumber, I favor this type of seal, and though I have seen the horns break free from the wax and block the drain, it’s a rare occurrence.
Photo: Wax seal with plastic horn.
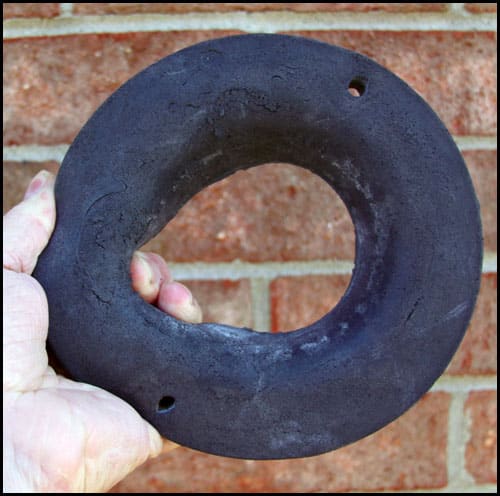
Photo: Sponge seal
Photo: WaxFree™ toilet bowl gasket from Fluidmaster. Photo by Fluidmaster.
Before wax rings were used to seal bowls to the drainage system, plumber’s putty was used to form a gasket. The putty was plucked from a can, rolled and pressed into a ring and set on the floor surface or the flange. This Play-Doh-like material made of oil, clay, talc and limestone can do a decent job, but some brands are known to dry out and crack. Eventually, it can wash away. Today, I don’t find the product being used much for this type of work.
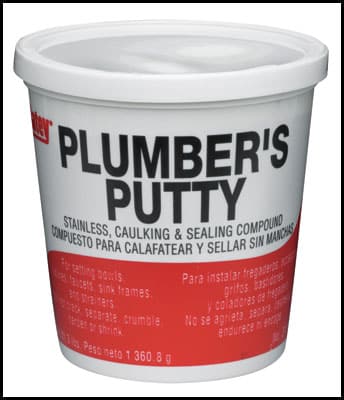
Photo: Plumber’s putty. Photo by Oatey
Replacing a flange
When a toilet flange is badly broken, but readily accessible, I always recommend replacing the flange. Unlike removing a plastic flange, removing an old cast-iron flange from the piping is simple. Using a drill and bit, a series of closely connected holes around the lead caulk joint will allow the joint to be pulled apart and the flange can be freed from the pipe. And though I find fewer and fewer plumbers who can work with lead, a good plumber will set a new flange over the pipe and pour a lead joint to make the new connection.
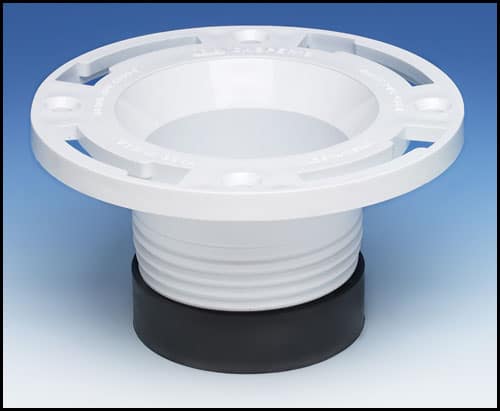
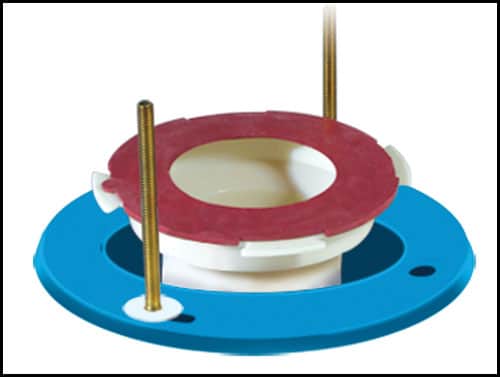
Photo: This flange inserts into pipe and the gasket is expanded to make the seal. Photo by Oatey
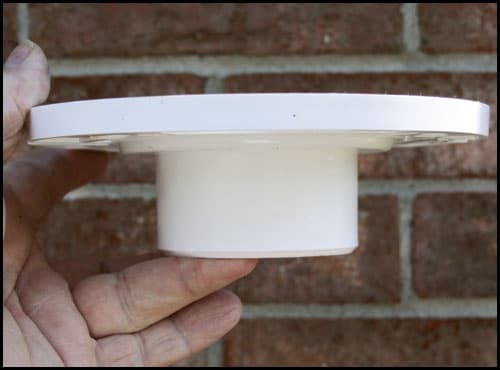
Photo: The horn of this flange is primed and solvent welded (glued) to the inside of the pipe.
It is difficult to break a plastic flange free from the pipe. If accessible, cutting and replumbing an entire section of pipe and adding a new flange is the best way to go. If the plumbing is not accessible, removing the top of the flange and inserting a specialty fitting into the existing pipe might be the best choice. These fittings create a tight seal between the outside pipe wall of the new flange and the inner wall of the old pipe. Some seal with gaskets and others are solvent-welded. There is a wide range of insert-type replacement flanges for 4″-pipe that tend to work well. There are fewer choices for 3″-pipe.
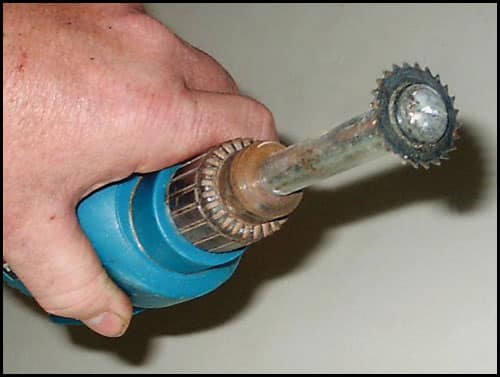
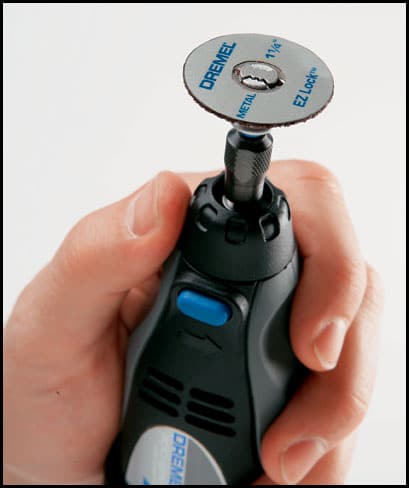
The top of a plastic flange can be cut away with specialty tools such as a cable saw, which pulls a wire tool through the pipe from the outside. An inside-pipe cutter or Dremel tool can be used to cut the flange’s top away from the inside out. Once a flange is replaced, the key to keeping it firmly attached to the plumbing and the toilet to the floor is to anchor it securely.
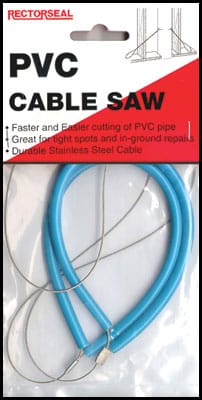
Photo: PVC Cable saw. Photo by RectorSeal
Brass flanges sometimes pull from their lead connections. When the lead fitting, referred to as a lead bend, is located in a crawlspace or an open basement, it can be removed and adapted so a plastic fitting and flange can replace the damaged one. When the fitting is buried in an old mud floor covered by tile and located above a beautiful ceiling, sometimes it can be salvaged. Brass flanges are still available. To install a new flange to the old lead plumbing, the lead must extend high enough into the flange after it has been thoroughly cleaned and trimmed so it can be soldered to the flange.
Photo: Dremel tool. Photo by Dremel.
Soldering lead to brass is usually done with a 50/50 or 60/40 lead and tin solder. It is best done by professionals. Only a small section of the joint can be soldered at a time. Each section must be heated enough to make the solder flow while still keeping the surrounding floor area cool enough so it won’t catch fire. Overheating the joint not only presents a fire hazard, it can melt away the lead. Once it is gone, it is gone, and the connection cannot be completed.
Repairing a broken flange
Loose toilets can leak and cause minor cosmetic or major structural damage. They allow sewer gases to enter the room and can create an unsanitary condition. Bowls that are loose to the point where they rock or shift during use can break a supply line and trigger a flood. Toilets that rock or shift can startle users resulting in pulled back muscles and even falls.
Toilet flanges are susceptible to breakage when the toilet is overly tightened or when the flange is attached unevenly to the floor. Breaks often occur at the bolt slots. The rim of the bolt slot is the weakest part of the flange. Since two bolts are needed to properly hold a toilet bowl in place, a break at either of the two slots can make it impossible to pull the toilet toward the flange and tight against the floor.
For simple breaks that leave a substantial portion of the rim in place, a spanner flange often is used to make the repair. This is true for both metal and plastic flanges. A spanner flange is a crescent-shaped piece of metal that is slid under the edge of the broken flange. It’s put in place after a closet bolt has been slipped through an opening in the center of the device. Some have additional holes for anchoring the spanner to the floor. This is helpful with plastic flanges; however, a heavy spanner placed under a metal closet flange rarely needs additional anchoring.
When the top of the closet flange is below or flush with the floor surface, it’s difficult to slide a spanner into position under the broken flange. It’s usually easier to anchor the spanner firmly on top of the broken section instead of under it.
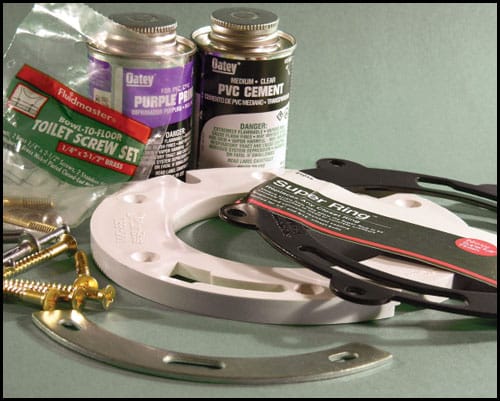
Photo: A Spanner Flange at the bottom of the photo and a Super Ring to the right are among the flange fix parts seen here. Photo by TS Hart
When both bolt slots are broken, the Super Ring, a closet ring replacement part, works well. The metal ring is sealed and attached directly to the surface of the damaged closet flange. Tabs and anchor holes throughout the device allow it to be anchored to the floor at several locations. The part can require some minor trimming so that it will fit completely under the bowl and when this is necessary, it’s done with a grinder or hacksaw. After it is firmly attached, the toilet bolts and seal can be put into place as if it were the original surface of the flange.
Taking a Drain From Lead to Plastic
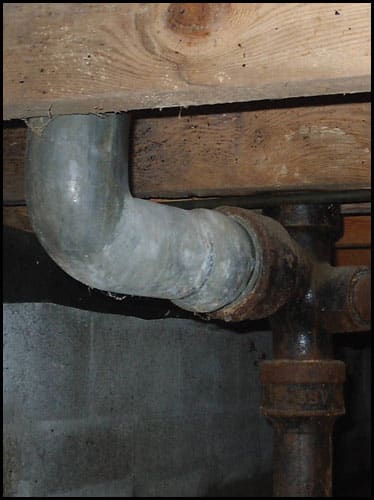
Photo 1: The lead bend
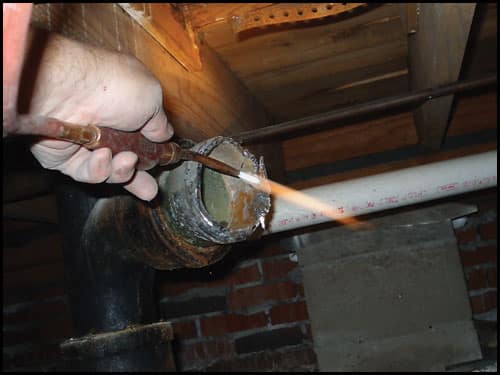
Photo 2: The lead is being cut and burned away from the fitting.
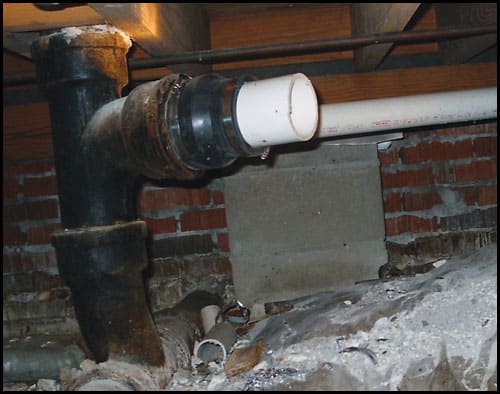
Photo 3: The adapter is installed and
ready for plastic fittings.
Raising a Flange
As noted earlier, closet flanges should be set so they rest on the finished floor. If the flange surface is flush with the floor, it’s generally not a problem. On occasion, toilet flanges end up well below the floor. The causes vary, but perhaps the most predominant one is a change in floor coverings. When a flange is set for a vinyl covering and later a thick tile or a hardwood is installed, the flange can become too low for a first-rate seal against the toilet bowl.
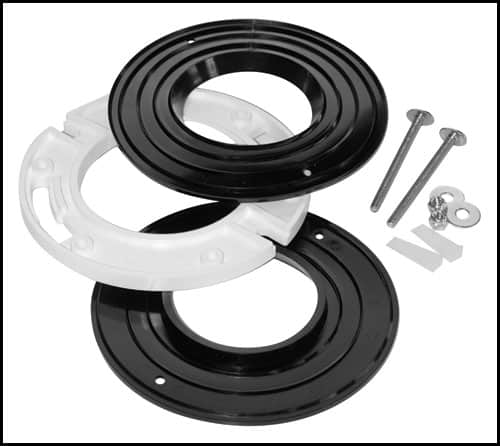
Photo: Flange spacers with gaskets. Photo by Oatey
Sometimes, when I find flanges that are no more than ¾” below a slab floor or 3⁄8″ below a wood floor, I use 3″-toilet bolts (standard bolts measure 2-1⁄4″ long) and stack two wax rings. But for flanges below these measurements, I install one or more flange spacers to bring the surface up to a good working height. Spacers are essentially the top portion of a flange that can be sealed to the original flange surface. In some situations, multiple spacers are needed and are an acceptable repair as long as they are sealed between each layer and securely fastened. A number of manufacturers recommend stacking no more than three spacers.
Some manufacturers specify RTV silicone caulk as the sealer to be used between each spacer, and I’ve found spacers that
can be solvent-welded together. Others are sold with neoprene gaskets for each layer. When the needed height is reached, long screws or anchors must reach through the layers until either the screws thread well into the subfloor or the anchors penetrate well into the concrete. After the spacers are secure, the toilet is set in the normal fashion.
Finally, though I know much of the information in the series “How a Plumber Inspects Plumbing: Toilets” has been well beyond the scope of a typical home inspection, I hope it has provided you with a better understanding of a toilet’s major components, some routine installation practices and some common installation mistakes. During the upcoming year we will continue the series “How a Plumber Inspects Plumbing” with installments on sinks, tub and shower enclosures and more. In the meantime, I’d love to see some of your unique plumbing photos. Perhaps they will be included in a future article or in one of my slide shows. Contact me at kennyhart1@cox.net or go to www.theplumbingandhvacguy.com.
——————————————————————–
Inspection Tips
I have worked as a plumber for more than 35 years and inspected homes for more than a decade. During that time, I have made and seen my fair share of mistakes when it comes to loose toilets and closet flange issues. I’d like to offer a few tips to help inspectors steer clear of these mistakes.
• Avoid getting specific when it comes to defining a fix for toilets loose at the floor.
Realty agents often ask me to review other inspectors’ reports to explain or to correct plumbing and HVAC concerns. I’ve noticed inspectors routinely recommend replacing the bolts and the wax seal under a toilet that is loose on the floor. Although it’s likely this is needed as part of the overall fix, clients mistakenly assume that this alone will take care of the problem.
Many seem to believe the seal has some anchoring ability. They have no understanding of how the toilet is held to the floor. Perceiving this as a simple repair or a quick service call, clients agree to do it themselves or to set aside an amount of money far too small to cover a broken flange or other defect.
• When inspecting a crawl space, check for water damage from a leaking toilet.
If an inspector is going to pull back insulation to check for moisture damage in a crawl space, there are key areas where they are most likely to score big. Below exterior doors, behind ledger boards that support decks and beneath tiled showers are among the top places to search. But investigating the area below toilets should also rank high on the list.
A leak at the toilet’s base will readily show if it is above a ceiling. Staining or even a drip to the space below will alert someone that a serious situation exists. A leak above a slab can damage the floor covering and might even loosen tile, but structural damage would be rare. A leak above a crawl space undetected for months could result in major structural damage. So, a thorough inspection below toilets set above crawl spaces should be considered an essential part of a good home inspection. Pull back any insulation below toilets and look closely for moisture.
• Checking for a loose toilet can do more harm than good
There appears to be several methods inspectors use to see if a toilet bowl is fixed firmly to the flange and floor. Many grip the bowl with their legs and use a rocking and swiveling motion. Some grab the bowl and give it a twist. Before performing any test, I recommend a quick look and even a tug at the bolts or china caps. If one is missing or loose, don’t attempt to move the toilet. Either situation qualifies as a defect; any movement can only serve to create a problem or make an existing one much worse.
Though shifting the toilet with your legs or hands can tell you if the toilet is loose, sitting and shifting your weight on the toilet can be an effective way to determine if the bowl rocks. It can also give you a heads-up if the supporting wood is saturated below the floor covering. When tested this way, I have had water ooze out from bowls that would not be forced out otherwise.
Photo: The missing bolt qualifies as a defect. Don’t rock the bowl!
——————————————————————–
——————————————————————–
Unique Problems With Clever Fixes
Both metal and plastic flanges are similar in appearance and experience some of the same problems, but flanges made of different materials suffer from some unique problems as well. For example, I’ve noticed plastic flanges can stretch at the bolt slots. This movement can allow the head of the toilet bolt, especially smaller ones, to pull through as the toilet is tightened from above. A common practice to prevent this is to lock the bolt into place with a second nut and washer before the toilet is set in place.
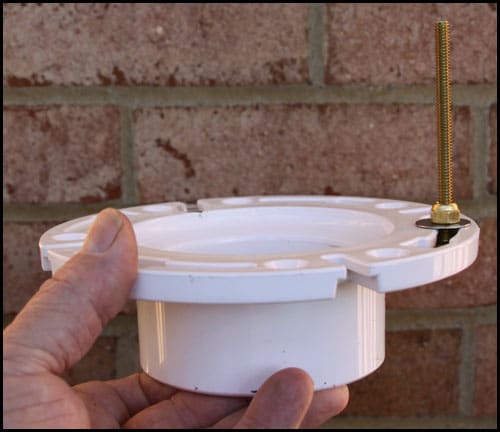
Photo: Locking the bolt as shown in the photo can prevent it from pulling through the flange slots.
It is common to pull a loose toilet and find extensive damage to the wood directly around the flange. Rot caused by a leak is usually the problem, but on occasion the damage is from the original installer’s overcuts. Overcuts in the supporting wood can prevent the flange from attaining the support needed to hold it and ultimately the bowl in place. Plumbing alone seldom holds a toilet firmly in place.
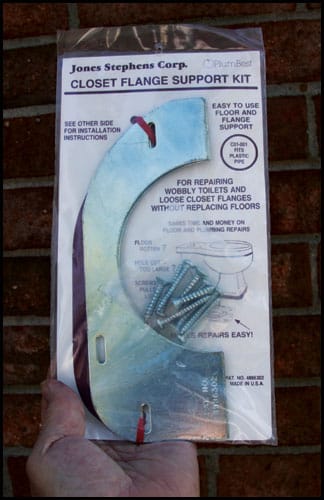
Photo: Support plates slid under and around the flange can add support to flanges when wood rot or installer overcuts are
an issue.
The best way to take care of the problem is to replace or repair any damaged wood so the flange can be fastened tightly to reliable material. When repairing or replacing the wood is not an option, flange support plates can be installed to reinforce the floor and provide a sturdy anchoring surface.
The steel plates are sold in pairs and are shaped to fit under most bowls. The plates must be screwed to the floor after the sections are slid under both sides of the toilet flange. Then small holes are drilled through the flange and plates so the flange can be tightly attached to them with large sheet metal screws.
Toilets installed on uneven floors often rock during use. As well as breaking a supply line, this motion can break the seal between the toilet and the flange. I’ve seen this type of movement walk a wax ring right down the drain. To stop this, shims can be purchased or built on site to steady the bowl. I use small slivers of lead or plastic wedge-shaped shims to do the job.
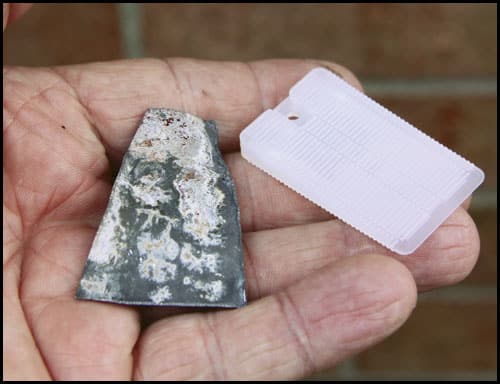
Photo: Plastic or lead shims can be used to prevent a toilet from rocking.
Once the shims are slid beneath the toilet’s base and the bowl is steadied, they need to be held in place. Caulking can be used to both hide and hold them. However, my favorite method is to pack and wipe a clean joint of tile grout where the toilet meets the floor. It not only hides and holds the shims, it acts as filler between all the gaps and once the grout is set up, it does a great job of preventing movement.
——————————————————————–
——————————————————————–
Caulking the Toilet to the Floor
Review any plumbing or home inspector blogs and you’ll surely find a thread about caulking toilets to the floor. The predominant argument against sealing toilets is that caulking will prevent a leaking wax seal from being discovered. The thought is if the joint is opened, water will flow from the toilet’s base and the defect will be discovered quickly.
The argument for sealing toilet bowls to the floor is that it prevents mop water and other unpleasant things from getting under the bowl. When this occurs, it causes an unsanitary condition and is a nearly impossible place to clean.
On several occasions, I’ve been called to investigate a leak in a ceiling and found that a large splash from a nearby tub or water from a poorly tucked shower curtain to be the cause. But because the toilet’s base was not sealed — caulked to the floor — the water that might have otherwise run around the bowl, passed under it and through the opening where the flange penetrates the floor. Beyond that, I realized long ago, that caulking can actually aid in holding the toilet in place, making a seal less likely to leak in the first place.
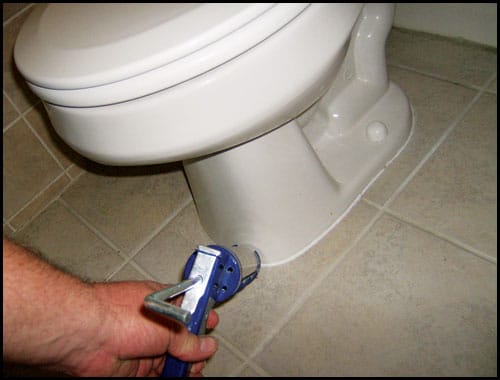
Photo: I recommend caulking the bowl to the floor
Finally, there are some positive energy conservation gains that can be earned by caulking the bowl. But some plumbers and home inspectors will disagree with caulking the bowl to the floor. Perhaps the best argument of all lies in the major codes. A review of the International and Uniform codes clearly shows a watertight seal is required where plumbing fixtures meet floors and walls. So, when asked what should be done, I recommend caulking the bowl to the floor.
——————————————————————–
Unless otherwise noted, all photos in this article are by Kenny Hart.
To Read the Full Article
ASHI offers its members unparalleled resources to advance their careers. ASHI offers training for inspectors at all levels of knowledge and experience, including resources about all major home systems. Members benefit from a vast network of experienced professionals, providing a community for mentorship and knowledge sharing..
In this Issue

FIND A HOME
INSPECTOR
Professional Networking
Grow your professional network, find a mentor, network with the best, and best part of the community that’s making home inspection better every day.

